Tuesday 31 March 2015

Three (3) always habits to prevent your facebook account from being hacked


1. Always unchecked the keep me logged in box before signing in. Highly recommended, when you are using computers in cyber cafe’s, friends and classmates. To be safer unchecked it even in your own PC.
2. Always log out your facebook account?


3. Always erase your browser’s history and cookies. 


 Facebook account hacking is rampant now a days, if you follow these habits it will not make your facebook account invincible from hacking but at least it is now harder for them to do so.

Monday 30 March 2015

How to Remove Shortcut Virus in PC and Flash Drive

How to Remove Shortcut Virus Ultimate Guide

How to remove shortcut virus? I receive so many complaints about this shortcut virus. How it affects every precious file that we value the most. If your file is infected by it, it will be hidden and inaccessible until at some point that it becomes corrupted and unusable. Not good, right?
In response to that, I created this ultimate guide on how to remove shortcut virus and other important things that you need to know about this virus. To make you aware about it and be able to protect your devices against it. So let’s start with its types…
Types
Shortcut virus has two variations; the most common is Flash drive Shortcut virus, then the File and Folder Shortcut virus.

File and Folder Shortcut Virus

How to remove shortcut-virus
This shortcut virus replicates your files and folders, hide and replace it with shortcuts.exe. This is a combination of Trojan and Worm. The bad thing about this shortcut virus, it will leave you no options but to click it in order to open your files and folders. Then after executing it, the virus starts to duplicate itself and install malicious software that monitors your computing habit and worst, steal your important data and credit card information.

Flash Drive Shortcut Virus

How to remove SHORTCUT VIRUS
This is purely Trojan; it consolidates every file in your portable devices and put it into one hidden folder. Then, it creates a Flash Disk shortcut.exe. Like the file and a folder shortcut virus, it will give you no choices but to click it to see your files. Once executed, it installs malicious applications that spy your computing routine and most probably steal your financial records if not detected.
First Aide
Unfortunately, not all antivirus can detect shortcut virus. So, the best thing you can do, is to make-it-a-habit not to open your portable devices or hard drive via autorun or from “my computer”. Here’s the complete Shortcut virus First Aide to do lists;
  • Do not open your Flash Drive via autorun and from My Computer.
  • Open your Flash Drive and Hard Disk by right-clicking it, then click explore or type  its drive letter in the windows address bar to prevent any script from running.
  • Follow the instruction here how to unhide Files hidden by the virus, to see the real files which are hidden by shortcut virus and to avoid executing it.
The above steps are designed to prevent shortcut virus from infecting your computer. It will also help you distinguish the real file from the virus-made files. As what I have said earlier, even prominent antivirus failed to catch shortcut virus. Nonetheless, I will be sharing you 3 methods to remove it, follow the guide below;

How to remove shortcut virus using shortcut virus remover tools – Method 1?

Download these two tools, namely: Trojorm Removal Tool and Shortcut virus fixfolder, click here.
Now, after downloading the shortcut virus remover tools above, extract it using winrar or any other file decompressor. Then run the “Trojorm Removal tool” first, make sure that you run it inside your flash drive, wait until the scan is complete and press enter. Next, copy the Shortcut Virus fix folder, paste it inside your flash drive or external drive. Then, open it via right-click, choose “open with” and select “notepad”. Look for the H:, change it according to your Flash Drive’s letter (ex. E:, F:, G: and so on).
When you are done editing, save it. Now double click the vbs file or open it via right-click, choose “Windows Based Script Host”. . .after running the script, shortcut virus must be gone and your files are now visible.
How to remove  Shortcut Virus on Flash Drive

How to remove Shortcut virus using command prompt/CMD? – Method 2

You should  proceed this method if the first one doesn’t work. This involves a “command prompt”. Now click “start”, “run”, “type cmd” “type the drive letter of your flash drive or external hardisk and a colon after it “eg F:” Once done type this attribute “attrib f:*.* /d /s -h -r -s”. You should see your files now and Shortcut Virus must be removed.
How to remove Shortcut Virus using cmd
Please take note the f: after the attrib, change it with your flash disk drive letter; if your flash drive, drive letter is e: then change it with e:.

Windows detected a hard disk problem --Solved

Windows detected a hard disk problem, what does it mean?
  • Your hard drive is failing and may die sooner or later.
  • You can lose all your programs, data, documents, videos, music and important images when your hard drive eventually failed.
  • You  may encounter freezes and not responding error.
  • Your Windows operating system files may become corrupted and unbootable.
What to do when you receive this message “Windows detected a hard disk problem”?
windows-detected-hard-disk-problem. Back up your files immediately to prevent information loss, and then contact the computer manufacturer to determine if you need to repair or replace the disk.
  • First, don’t panic, stay calm.
  • Take heed of the drive partition (c:/d:, etc) that are failing and the one that aren’t. To save you time and concentrate on checking the failing partitions.
  • Do a “CHKDSK“, by pressing “windows logo + r” simultaneously to get the “run” window.
Windows-detected-hard-drive-problem
  • In the “run” window → type “cmd”.
Windows-detected-hard-disk-problem-cmd
  • Once you’re in the “command prompt” → type the drive letter you want to chkdsk (be it c:/d:/e: and so on) or leave it as is, if you want to test the default drive partition.
Windows-detected-hard-drive-problem-cmd
  • Then type “chkdsk” and hit “Enter” to start the “chkdsk”.
Windows-detected-hard-drive-problem-chkdsk
  • After Windows scan your hard disk for errors it will give you good understanding on where and what is going on with your hard drive. How many bad sectors and other useful information.
However, if you want to directly full scan your hard disk for errors and let Windows do the automatic fix of system file errors as well as bad sectors, follow this guide:
How to run chkdsk and attempt bad sectors recovery?
Go to: “start” → “my computer” → “select the drive letter you want to check disk” → “right-click it” → “select properties” → “tools” → “check the ‘scan for an attempt recovery of bad sectors” → “click start“.
Note: If you selected the drive that contains your Windows operating system, you will be prompted to reschedule the scan after restart.

Windows-detected-hard-drive-problem-check-disk-local-disk

Why should you perform a chkdsk on your hard drive when you encounter “Windows detected a hard disk problem“?
Someway or another “chkdsk command” may fix the error because it will mark the bad sectors and refrain from using it. Though, it is given, once this error “Windows detected a hard disk problem” keep on displaying, you’re hard disk is in extreme trouble—but sometimes it’s just the bad sectors which “chkdsk” will be of great help.
What if chkdsk command isn’t able to solve the “Windows detected a hard disk problem?
Windows dected hard disk problem chkdsk-bad-sectorsIt’s time to back-up all your important data. As what I have mentioned earlier, remember those drive partitions that aren’t reporting failures. You can use those partitions to  save your precious files. However, if your whole hard disk is failing, you need to have a new one or an old one from your old computer.
Now that you backed all your important data up, what’s next? Is your hard disk repairable?windows-detected-a-hard-disk-problem-format
There is still a big possibility that your hard drive can be repaired. How? Try to reformat your hard drive using another computer—by “right-clicking” your hard disk → select “format” → uncheck the quick format → Then, click start. You should format it without checking the “quick format”. It may take sometime, depending on your hard disk size but patience is virtue.
When you finished reformatting your hard drive, test it, re-install your operating system and observe it, if the error still appears. If there is none anymore, be glad but if it is still reporting “Windows detected a hard disk problem”—we will try another solution on my next post.

Sunday 29 March 2015

How to Reset Window 7 Administrator password


In this tutorial we will reset the administrator account password in window 7. With this method you can reset any users password in window 7. Window have a inbuilt utility Utilman.exe for disabled people. Utilman.exe allow users to configure the accessibility options like Magnifier, High contrast theme, Narrator and On Screen Keyboard before they log onto the system.
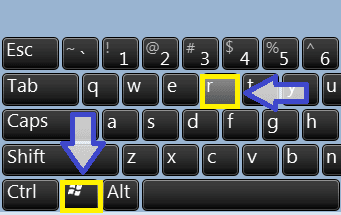
This utility was designed for disabled people who are hard of sight, hearing or mobility to log onto Windows themselves without the need of outside help. You can run this utility by pressing Window Key + U on window login screen. Or you can click on Ease of Access icon. This will load Utilman.exe application from Windows\System32\ directory. Furthermore this application run under the system account which have the highest level of privilege.
accessibility-options
You can take advantage of this utility to reset the user accounts password. You need to replace the Utilman.exe file with cmd.exe file and you will have access to the command prompt running under the SYSTEM privileges. From command prompt you can easily reset the user password.

Step by step guide on how to reset window 7 password

Our primary goal is to replace the Utilman.exe with cmd.exe. You can achieve this goal by several methods like boot system with Live disk and replace the file, boot system with recovery disk and replace the file. In this tutorial we assume that you do not have any bootable disk or live CD. We will do this without any third party software or disk.
To do this turn off the system without properly shutdown. Repeat this until you get Windows Error Recovery message on start up. Select Launch Startup Repair (recommended) and press Enter Key
launch-startup-repair
Window will load necessary files for recovery
window-load-files
Window will automatically try to fix the problems. This process usually take long time so stay cool, you need to do nothing here.
start-up-recovery-running
After a long wait [ around five to ten minutes ] you will receive following message
Windows cannot repair the this computer automatically.
Click view problem details
view-problem-details
It will open problem details in message box. Scroll the message to bottom, at the end of message it contain hyperlinked privacy statement, click it.
problem-details-file
Privacy statement will appear in notepad, Click Open option from File menu item
privacy-file
Click Computer to show all drive
privacy-file-computer-drive
You have to check each drive for Window. Drive letter showing here will be different from the drive letter you see in My computer while system normally boot. Open each drive and find out the partition which contain the windows installation files.
Open Windows folder
window-files
Open system32 folder
window-folder
Change file type to all
file-type-all
Select Utilman file and do Right click and click Copy
utilman-copy
Paste the copied file
utilman-paste
Select the copied file and do right click and click Rename
utilman-rename
We will change it with some descriptive name
window-rename-utilman-type
Set it to Utilman-org
utilman-org
We have taken the backup of original file. Now delete the original file. Select the Utilman file and do right click and click Delete
utilman-delete
Confirm delete operation
utilman-delete-confirm
Now select the cmd file and do right click and click Copy
cmd-file
Paste the copied file
cmd-paste
Select the copied file do right click and click Rename
cmd-copy-right-click
Rename it with Utilman
cmd-rename-utilman
We have replaced the Utilman.exe with cmd.exe
utilman-cmd-verfiy
That's all we need to do here. Close the dialog box, close the file, and close the Startup repair box and Click finish
startup-finish
System will be shutdown. Turn on the system again, let the window boot normally this time on login screen click Ease of Access icon. We have replaced Utilman.exe with cmd.exe so it will launch command prompt instead of accessibility options dialog box.
command-prompt-at-login-screen
Type following command and press Enter
net user administrator *
net userCommand
administratorUser name [ Replace it with user name if changing other users password ]
*Set new password
net-user-command
Type the new password / Retype the password to confirm it. Be aware you will not see any asterisks [*] sign here when you type in your password.
net-user-command-password
Close the command prompt and use the new password to sing in
login-screen
Wow we have successfully changed the users password now it's time to revert the change which we have made during the process. Open My Computer and open the window partition
window-partiton
Open System32 folder and select the replaced Utilman file
window-replaced-utilman-file
Do right click and click Delete option
window-utilman-delete-option
Confirm delete operation
window-utilman-delete-confirm
Select the Utilman-org file and do right click and click Rename
window-utilman-org-right-click
Rename Utilman-org to Utilman
window-rename-utilman-type
We have restored the original file.
window-utilman-restored
We have restored original window utility. To confirm it restart the system and click Ease of Access icon, this time it would launch original Utilman.exe
accessibility-options
Congratulations you have successfully reset the users password without harming any window files or using any third party tools.